Showing posts with label Artsy-Craftsy Me. Show all posts

Sunday, March 4, 2012

MOPS Monday- Chalkboard Pots

For our other meeting in February, we had a speaker come share gardening tips for our group. To go with this topic, I chose to do a potted plant as the craft, with an added twist of having the pots painted in chalkboard paint. However, because of the time to prime and paint the pots, I had to do this myself at home before the meeting. To still make it a craft worth doing, I bought a pot of flowers for each mom and provided the chalk and decorations for the pots.

My inspiration was this picture, which turned out a million times better than my own:
(I got the idea from Pinterest and used the original site, along with others, for directions. However, when I tried to link to it just now, I was warned that there were possible viruses. So I say, just google it or browse Pinterest for further images/directions.)

I really struggled to do this craft within my tiny budget, so I cut some corners. I bought one base for the terracotta pots as an example, but did not buy them for each person, as it would've added nearly $15 to my budget. I also was able to buy 2 pots and get the third free with special coupons from Fred Meyer, which helped cut down on the cost. 

I used the cheapest painter's tape I could find too. First, I taped off the rim of each pot with the painter's tape. 

The employee at Michael's recommended that I seal, prime, and paint each pot, but I ended up buying a black paint that said it was for ceramics, hoping that was good enough to seal and prime it together. I took all 15 pots outside, after being taped, and painted them with the ceramic paint. I coated each pot about 2 times, until all of the pots appeared to be evenly covered. I did notice that you could see where the price stickers had been, but the chalkboard paint later covered this up- no worries!

Once dry, I brought them inside.

Then, my mom helped me to paint each pot with the chalkboard paint, according to the directions:
 
And, once dry, I removed the painter's tape:

Then, I decorated the rim by gluing hemp around the rim and into a bow:

I bought pre-potted primroses for each mom to put into her new pot. In mine, I had violets. And then I used a chalkboard marker to write on my pot: Roses are red, violets are blue, I love MOPS, because of you!
(My violets were dead by this point! I do NOT have a green thumb!!!)
(I also think my pot failed in comparison to the inspiration because it was missing the bold, white, simple word the inspiration had. I think the small, colored hand-writing on mine makes it look less classy. I also like the original herbs, but found that I could not find pre-potted herbs for everyone in February. While I could've provided seeds and soil, I liked the instant gratification of already-blossomed flowers.)

I then bottled up nearly 2 ounces of the chalkboard paint for each person to take home their own bottle. This way, they could do any touch-ups they needed or do their own chalkboard project at home.

I made up directions for each person to take home, instructing them on how to properly use their chalkboard paint:

And, I made sure to add the inspiration picture, along with this idea as well, on our MOPS facebook page, so that everyone could see the great ways they could use their pots:


MOPS Monday- Dry Erase Frames Craft

MOPS Monday is coming to you very late on a Saturday night/Sunday morning, but at least it's coming to you, right? If I didn't just post this, it'd never get done!

So...

I've seen these pictures floating all over Pinterest and immediately fell in love! I love that they are simple picture frames with just a piece of paper inside, and you can write on the glass with a dry erase marker, changing your message as often as you want!
Pinned Image Pinned Image Pinned Image Pinned Image  love message board 1
(Sources: #1, #2, #3, #4, #5)

I knew that, for our February love theme at MOPS, this craft would be perfect! I mirrored mine most after #5, since they used a patterned paper, told their exact fonts in their tutorial, and used flowers to adorn their frame.

I bought my frames from the Dollar Tree for $1, of course. The frame is specifically for documents or certificates so it holds an 8 1/2" x 11" piece of paper. I bought the paper inside from Michael's for $0.59. It was originally 12"x12" and I just cut it down to the appropriate size. Felt is $0.29/sheet at Michael's. I used 1-2 sheets of white and gray, so I'll say $1.20 for all of the flowers. (It'd be cheaper, though, if you did less/smaller flowers.) This is the tutorial for the flowers, which I still can't find an original source for:
Felt flower tutorial
Finally, I bought dry erase markers for roughly $1 each from Bi-Mart. I'm sure WalMart or any other store has them for around the same price, if Bi-Mart doesn't exist in your area.

This was the sample I made:

Before we did them as a craft for MOPS, we held our annual bake sale fundraiser. And, since not everyone can eat sugary sweets as well as wanting to add a few items for additional sales, I made quite a few crafts for the bake sale- including these frames! I sold them for $3, which I realize doesn't give you much, if any of a profit. However, since I made them and MOPS earned the money, MOPS still earned a profit, and every single one sold! Just before making them for the bake sale, I found one more style of frame, which I couldn't help but also include:
Pinned Image

For the 2nd paper, I just designed it myself using Microsoft Word, mimicking the original the best I could with the fonts I already have. So, for the bake sale, I made one sheet of each and sold the frame with both papers (which could be rotated out), decorated with flowers, and sold with a marker:
   

For most of these, I cut the pages down to 8"x10" and mounted them on a white piece of cardstock for a little bit of contrast and border. When it came down to doing this craft for our official meeting, I decided to condense it and have the ladies glue the two different papers to the front and back of cardstock, sandwiched in the middle. (I printed them all ahead of time on various patterns of scrapbook paper, since there was no way to have the moms make it themselves at the meeting.) With the papers mounted front and back, both papers are always inside the frame and the paper needs to just be flipped around when you want to change the saying. (There are no pictures of this, but I bet you get the idea.)

These frames were a HUGE hit. The ladies at my MOPS group seem to love the felt flowers, just like they did when we did the t-shirt scarves, since they are such a forgiving craft and look great no matter how much you butcher them! The rest was easy to put together and makes such a cute piece of decoration for your house or as a gift for a friend! 

Saturday, February 4, 2012

Artsy-Craftsy Me: Valentine's Take-Out Boxes

Today we had our steering meeting for MOPS, where the coordinators meet together to plan out the next month's topics, food, crafts, childcare lessons, etc. I have been trying to bring a sample of each craft I want to do so that the other coordinators can SEE the finished product. I know that not everyone can envision something based on just a description. So, I make up an example and present it to the group. I learned today, though, that it may be smarter to make only one instead of 7! I created all 7 as a gift for each person, and I'm glad I got to share it with them. They seemed to love the finished products and were appreciative of their sweet little gifts, but because I created two love-themed crafts for February when we're having one relationship-themed meeting and one gardening-themed meeting, this idea got tossed out. No hurt feelings. I understand fitting the craft to the theme, but I wish it hadn't taken me all day yesterday and staying up late at night to finish the crafts when they won't actually be used for the meeting.

Disappointment aside, I thought that SOMEBODY might want to make these adorable gifts, and one coordinator specifically asked me for the instructions. So I thought I'd make up a tutorial.

What am I talking about? These cute Chinese take-out boxes filled with felt fortune cookies!

Take-Out Boxes:
I got the template for the boxes from this site. The small box is very small and the large box seemed to fit better for what I wanted. However, since my printer doesn't print on 12x12 paper, I had the hardest time getting the right size pattern. I ended up holding a piece of 12x12 cardstock to my computer screen and tracing the image. Then I laminated the pattern with contact paper and cut it out. If you know me personally and want to borrow my pattern, that's fine. Otherwise, hopefully between the site I linked to and my experience, you can make your own.

I traced this pattern on the back of my sheet of cardstock, using a different pattern for each person. You just cut it out on the perimeter (just like the pattern is) and then fold on every dark line. Your's won't have dark lines if you just trace the outside, but it's pretty easy to know where to fold based on where your corners/joints are. I used tacky glue on most of my boxes to glue the far left tab to the far right side of the box (going by the picture). I also folded down two of the bottom tabs (left and right) and then folded the other two (top and bottom) over those and glued them down to secure the base. I threw an extra one in at the last minute and used hot glue instead. Both glues work great, but the hot glue does not give you room to readjust your pieces. I found out after I was completely done that my slit and tab for closing the flaps did not line up. I ended up having to cut an extra slit and it wasn't a tight fit. Next time, I'd wait until I know how the pieces line up and cut my slit with an x-acto knife once I know where the tab should fit in. 

Fortune Cookies:
When it came to the fortune cookies, I followed the various tutorials I found online, but ended up using my own technique to shape them the way I thought they should be. So, I'll share my way! The other tutorials are pretty easy to follow and can be found just by googling "felt fortune cookies", but I found they weren't very informative when it came to understanding exactly how to fold them properly.

1) First, I cut squares of felt, about 3" squared. Then I traced a circle using the largest cup in my house. You could combine these into one step and just trace the circle right onto your felt without cutting a square. In fact, I'd recommend that. Live and learn :-) You could make a really large cookie or many smaller ones. Just make a smaller circle- easy peasy!

2) Next, I cut a piece of wire and hot glued it to the middle of the circle. I used floral wire because that's what I already had on-hand. It doesn't matter what kind- you just don't want it too thin/weak. I used the scraps of felt to cut a small strip to cover the wire. It turned out later that no one would see this, but it helped me to secure the wire with minimal burns and helped stabilize the cookie.

3) After the wire was set (roughly 30 seconds later), I trimmed the excess felt and wire from the cookie. Next, I added a line of glue along the top of the cookie. Do not glue all of the way across. You want it open enough for the fortune to go in and the glue is mostly to hold the shape. Then I folded the cookie to attach the bottom of the cookie to the top.

4) Once that glue was dry, I slipped the fortune through the middle of the cookie. You want just a bit to stick out.

5) This part gets tricky to explain but made the biggest difference in my method versus others. (That and gluing the top and the bottom together.) I slipped one finger into each side of the cookie until they met in the middle and folded the cookie (where the wire is) in half. I was careful to keep the middle of the cookie flat, though, as I bent it. I think this made it look more like a real fortune cookie. I found that the cookie looked too spread apart.

6) To keep the cookie a little more closed without losing the bend completely, I put a dab of hot glue in the crease, slipped my fingers back in and held the cookie closed until the glue dried. Once dried, I pulled my fingers out and found the perfect shape, in my opinion.

(The fortune is easy to pull out, but I wouldn't expect it to go back in easily... or maybe at all. I haven't tried to know for sure.)

This is the bottom of the cookie, to see how it wrinkles up (which seems pretty true-to-life to me):

And here's the finished cookie:

Fortunes:
I designed the fortunes in Microsoft Word, using Word Art, shapes, and various fonts. These pictures are replicas of the fortunes, showing the font and design I used, but not true to size. I printed them out on regular printer paper and used a glue stick to glue the "Happy Valentine's Day" and the note to the person back to back. Just one layer of printer paper would be too thin in the size that I made my cookies. You could print on cardstock instead and only use one layer, though.
Each person got 2 cookies in their take-out box (there was probably room for a 3rd or possibly even a 4th). For the 2nd cookie, I used two Bible verses. I wanted them to fit with the love theme too. So I chose one about loving each other and one about God's love for us:
Embellishing:
I wanted to make a cute little label on the outside of the take-out box. I got the idea from this site. Their take-out boxes are ADORABLE and I'd love to buy some like them, but I was purposely trying to find a way to make my own out of scrapbook paper. I loved the label as well, so I created my own version. If you read about my body scrubs, then it is pretty much the same process. I designed it on Microsoft Word using a 1.5"x1.5" circle and a text box with various fonts and colors. 
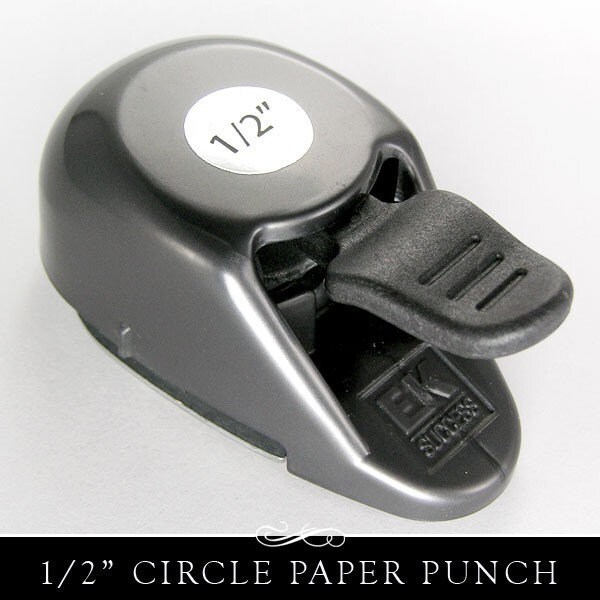
I punched it out with my circle paper punch. It gives me a perfect circle in seconds. So easy! I love it! 

Then I cut out pink and red scalloped circles from cardstock using my scalloped punch:
(This is just an online screen shot, same design, not the same size.)

This is what my final take-out box looked like:

A few suggestions for embellishments that I never got to do:
  • Create a handle. My suggestion would be to do this with ribbon. It was something I never got around too. I tried a pipe cleaner for one box and found that I didn't like the results at all. It was too short and aesthetically unpleasing. A thicker wire could also work. I wanted to make it a little curly too (when I tried the pipe cleaner). It'd be a cute little addition.
  • Add ribbon or a bow for a little extra texture. If you did a wire handle, a little bow would be adorable on it.
If you make one, let me know and link to pictures! I'd love to see how it works for you!!!


Monday, January 16, 2012

MOPS Monday- T-Shirt Scarves Craft


For our first meeting of 2012, we had a swap meet. Anyone could bring baby or maternity-related item, such as clothes, toys, baby gear, etc. and then anyone could take what they want from the items brought. There was no obligation, though. You could take even if you didn't bring, and it didn't have to be an even exchange. Anything that was left over will be donated to the Lane Pregnancy Support Center. So, while discussing ideas for our craft project that meeting, the idea of "out with the old and in with the new" was mentioned. I went over several ideas (mostly inspired by Pinterest) and settled on the idea of making t-shirt scarves. I browsed the internet and came across several variations and many, many tutorials. I gleaned inspiration from many sources and combined ideas from each to create my favorite aspects of them all, but I will link to the main tutorials I used. I, specifically, only used tutorials for no-sew scarves since it'd be hard to use sewing machines at our MOPS group, and not very many people are good at sewing.

For the first one, I made this scarf:

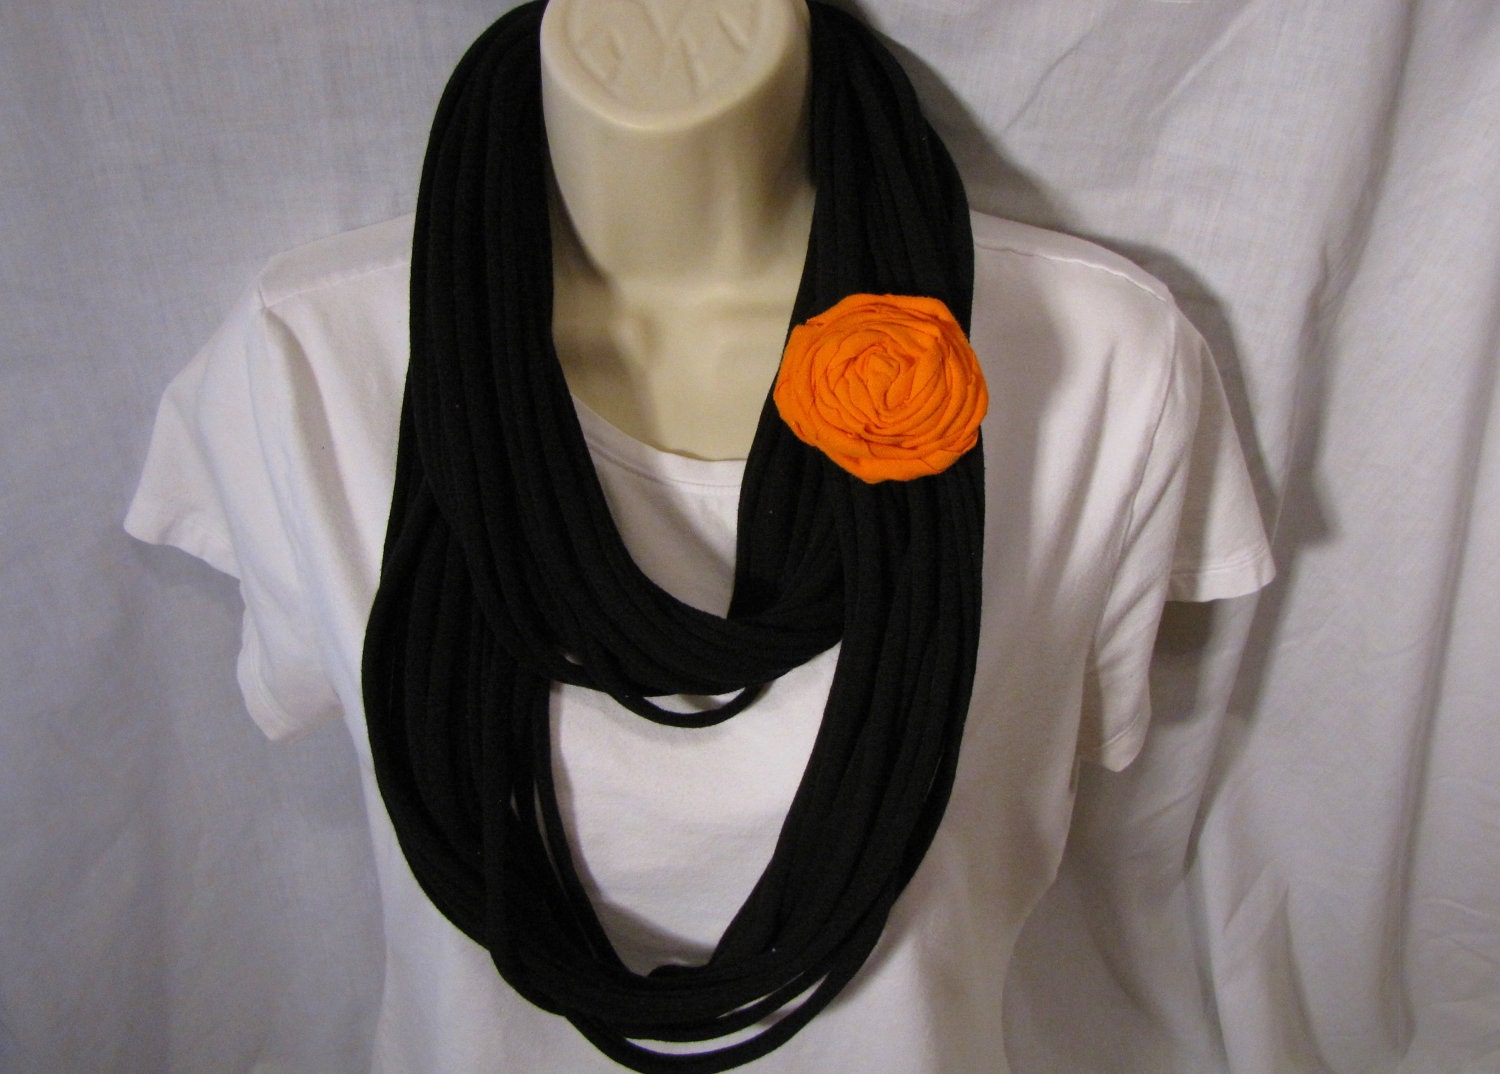
I was inspired by this blog and this scarf on etsy.
 Black Upcycled Reclaimed T-Shirt Scarf
I didn't intend to use all of the same colors as these since I looked at tons of examples, but now that I post them together, I see how similar they are. I have a few differences, though. For one, I didn't bind both ends of the scarf separately. I thought that seemed a little odd if you were just going to loop it around your neck twice anyway. If you didn't loop it twice, then the binding on the other side might seem out of place. So, instead, I looped the scarf around and bound them both at once. (That's not very clear in the picture, since it's behind the hanger.) I also did make a flower like the one pictured just by googling fabric flower tutorials, and I didn't like the way it turned out it as much. So I tried one like this:
 
and didn't like it either. So, I went back to the kind I normally make, which is like this: Pinned Image
I got that tutorial from Pinterest, but the site the picture is linked to no longer works. You can get all of the details from the picture, though. It's SO EASY and pretty much fail-proof! I like my flowers bigger than the 5x5, though, and usually make them 8x8 since that's the biggest I can get from one sheet of felt. I just used a safety pin to attach the flower and it's pretty well hidden. But if I were going to wear this regularly, I'd find a neater way of attaching it.

The 2nd scarf I made was this one:
  

I first had it as one really long scarf and looped it around the neck 2-3 times. The ends seemed too "scrawny", though, compared to how bulky the neck part was. So, then I folded the scarf in half to see if that looked better. It did, but I didn't like one end open and the other closed. Finally, I decided that it may look best as an infinity scarf, so I removed the end loop and attached the beginning and end together instead. Then I looped it around the neck twice. I, personally, like this variation the most. 

I was inspired by this blog:
No Sew Tshirt Scarf Tutorial
They used Auburn colors and t-shirts to make their scarf, so I, naturally, carried that over to make an Oregon Duck scarf myself. I do, of course, live in the city of the Ducks and we are now Rose Bowl Champions. So, it seemed like a perfect thing to do. They used 32 rings made from 4 different shirts. Since I only wanted to use yellow and green, I did each one 16 times. I'm not sure if I did anything else differently from the tutorial, but I was a little disappointed at how flimsy my scarf appeared. I guess in pictures it doesn't look that much different, but it wasn't my favorite.

Finally, I made this scarf, which is the one I was most excited about and is my favorite style: 

I used this blog for inspiration and while I loved ALL of her colors and flowers, I chose this one as my main source:
White T-Shirt Scarf with Gray Flower
This is the same blog I got the felt flower tutorial from earlier, but since I didn't like how mine turned out, I used the same flower as the first scarf, just in a different color. I really wanted to do it in grey, black, or white with my scarf, but I happened to be out of all of those colors. So, I used a baby blue instead. I also tried a variety of different width spirals, so I had some strands longer/shorter than others. This was because I had no idea how long it would come out. I also used a 12" plate rather than a 9" one and I used a 2X shirt, still coming up with 10 circles. I did notice that the middle of your spiral curls more nicely than the outside, so I tried to turn some strands one way and the others the other way to make it full on both sides. And, if one strand hung down too long, I just trimmed it accordingly. I then used the hem of the t-shirt to tie the scarf together below my neck, and then I attached my flower to the tie with a safety pin. I was really nervous about how much other people would like these. They seem so popular and trendy online, but how would it translate to real life? And it wasn't very helpful when I modeled them for my husband and his response was, "Eh..". But he's a guy. So what does he know? I was thrilled when I wore the white ruffle scarf to our steering meeting and was instantly greeted by one of the girls saying, "You look so cute! I love your scarf!" I replied, "Yay! I'm so glad you like it because this is our craft project this week!" And the girls seemed overall impressed that it was made from t-shirts. 

My next dilemma was how to do this cost-effectively. Who knew that new plain t-shirts were so expensive? Well, expensive relative to my TINY budget! I can spend about $50 on average per craft project and must plan for about 25 people. That's $2 per person. However, I was unable to find any shirts for less than $3.33 a piece. At Joann's, I found the shirts that they use for appliques and painting at 3/$10. This would be around $80 for all of the shirts I need, and even with a 10% off coupon, I'd still be WAY over budget. At Michael's, these same shirts were $3.99 each. I even tried Value Village, a local thrift store for used shirts, and struggled to find ones cheaper than $5. REALLY?!?! And those were stained or dingy looking. This was after looking at Target too, where all of their shirts were $5-12. If you were only going to make your own, this would be fine. But in the quantity I need to purchase, it just wouldn't work. My last idea was to check out WalMart, where I was able to get a package of men's shirts with 4 shirts for ~$10. That made them just over $2/ea.  When I brought up the issue to the steering committee, they suggested that each of them bring 3-4 shirts from home. With 8 steering members, that'd be 24+ shirts. We also announced it on facebook and asked members to bring any shirts they had from home as well. Then I bought one package of the shirts from WalMart to cover any extra members or if people forgot. 

We had our meeting last Thursday. The swap seemed to go over well. There were lots of items brought, and I think lots left over. I was happy to clear out a large portion of toys from my over-crowded house too! Not everyone participated in the t-shirt scarf craft. I'm not sure if the people who didn't participate are just not interested in crafts in general, not interested in this particular scarf, or if they were just busy with the swap meet instead. For those who did participate, I had excellent feedback. One girl did the ruffle scarf and used a t-shirt with a large graphic on the chest. I wasn't sure how this would work out because of the stretching, but it actually turned out really cool. With that particular style, you don't stretch it much, so the graphic wasn't distorted or broken but added cool pops of color through the scarf. It seemed like the felt flower was the most popular aspect of the entire craft too, just from watching people's reactions and seeing their excitement. I think that they loved how forgiving it was, how simple, and that it looked really great in the end even in their imperfections. Because not everyone participated, there were lots leftover. I left them in our craft closet for future use after telling everyone that they could take home extras to try other styles and colors too.

If you try this craft, on your own or at MOPS, please let me how it worked for you. I'd love to hear what worked and what didn't or any advice for making it better in the future!