Showing posts with label MOPS. Show all posts

Friday, April 27, 2012

Get comfy... it's time for an update

It's been so long since I've written, I'm not even sure where to begin. At first, it was the difficulty in blogging with an infant that kept me from posting. While I had stuff I wanted to share, trying to write an extensive post with only one hand didn't seem worth it. Micah's gotten more independent with each passing month so I have more hands free, but I still find myself constantly busy. That's life, isn't?! If Micah doesn't want my attention, Josiah usually does. If neither of them does, then I'm trying to do my own thing.

My most recent "own thing" is a party I'm throwing. I ran across this idea online, inspired by Oprah's Favorite Things show where she gives away all of her favorite seasonal items to each guest. Now, I'm not a bajillionairre by any means, just like most of you. So the idea is that instead of the host giving away a bunch of items, each guest bring their favorite things and we all exchange, allowing each person to go home with something new. Most people do a price limit too, so that no one feels put out. And the amount of things you bring and the price depend on how big of a party you are hosting. I'm having about 36 people and asked each person to bring 3 items with no price limit. I wanted to allow people to bring whatever they were comfortable with, without feeling obligated to spend a certain amount. For some, this may be $3 and for some, it may be $30. My other thought was that this party needed almost no decoration- you just open your home or find a venue, maybe have some tablecloths and a banner, and everyone brings their own stuff. Everyone is also even bringing their own food. I asked my guests to bring their favorite appetizer. Other parties do desserts or finger foods. BUT... as more and more people began to RSVP to my party and especially considering that 60% have never attended a party I've thrown before, I felt obliged to make it something more spectacular. I'm doing chevron prints and rainbow colors with elements of chalkboard and pinwheels everywhere. Confused? Once you see the pictures, it'll for sure make sense. The party is tomorrow and I'm VERY excited!!!

At the beginning of the party planning, I also decided to start trying to make my craft and party business more professional. I created a new blog just for that stuff. I spent a lot of time designing it, going back into my archives and pulling out old party and craft pictures to post, watermarking all of my images, and trying to network with other craft/party bloggers. It is so time consuming and there's so much more I need to do! First off, I kinda want to redo the design. I feel like branding is such a HUGE part of a business, and I'm struggling to find what brand I want to identify me. I've considered paying someone to do it professionally. I'm just not sure if I can afford it, but then I feel it affects so much else. Secondly, I've gotten a lot of traffic from Pinterest, but I have no followers yet. I probably need to link to more crafty link parties and hope to get more followers. Perhaps I can also get other crafty bloggers to follow me too by networking with them. I want to host my own link parties and have guest bloggers and do the same for others. It's a lot of work, though! So, when I was able to blog, I was mostly doing it there... and by "there", I mean http://sonny-sideup.blogspot.com. Please check it out, give me your honest feedback, and follow me there too!

I also stay very busy with MOPS. We have 1 more month of normal meetings and then will just have play dates throughout the summer. Out of the 8 steering (leadership) team members, 4 have decided to not continue on staff next year. I'm sad to not continue with the friends I've come to love, but I'm excited to see what God has in store for next year. I ALMOST took on the group coordinator position, but after lots of prayer and some long talks with the other girl who was interested in becoming coordinator, I felt that God wanted me to stay with crafts and for her to take the job instead. I've been very blessed with the friendships I've made and the way God has used me in the group.

When it comes to the other areas of my life, I'm just as busy!
Let me start with my kiddos...

Micah will be 6 months old on May 2nd. He is SO BIG! and absolutely the sweetest baby ever!
 
He is so close to crawling (at least a month and half earlier than Josiah did!) and is all over the place. If you put him on the floor, he can scoot, wiggle, and push his way all over the room. He can sit up, kinda, but he is so eager to grab things that he quickly falls over. Micah is absolutely one of the most smiley babies I've ever known. When I began taking him to the church nursery at 4 months old, I was quickly told by the workers that Micah has the sweetest disposition. He is so calm and relaxed and just grins from ear to ear at everyone. The only difficulty I have in caring for him is that he's not the only one I care for. It's the constant need of attention from 2 kids that wears me out, but each one individually is such a source of joy and pride!

Josiah amazes me everyday. His birthday is quickly approaching in 4 short months! I'll need to start planning by the first of June!!! 
 
He learns new words everyday. His lack of speech still concerns me a little, as well as the way he pronounces some things. It's hard to know what to compare him to because some 2 years olds speak as clearly as 5 year olds, and some speak less than 1 year olds... and both are within normal range. At his 2 year checkup, they expressed a little concern, but said we'll wait and see how it improves. He doesn't go back until 3 year checkup, so I guess we'll find out then if he should have some speech therapy. He's great at identifying things, but he's not very conversational. So, it's hard to ask him what's wrong or what he needs or to explain why he has to wait or listen to me. But if I'm reading a book with him, he can name almost everything on the page. He's wild and crazy and keeps me running always! It's a handful to hold Micah and keep Josiah from running away any time we leave the house, including the driveway, dr's appointments, church, MOPS, and anywhere else. I try to plan things when Jesse can help or do whatever I can to contain both boys at the same time. What am I going to do when Micah outgrows his infant carseat? EEK! We deal with major meltdowns multiple times a day, as is normal with 2 year olds. Most have to do with being told "no" or "hold on" or having to leave something he doesn't want to. And while it wears me thin sometimes, he is also SO sweet and loving. He loves crawling into my lap and snuggling with me. He gives me kisses and says "sweet momma!". I adore him!

As far as Jesse is concerned, life's a roller coaster as always. I really struggle with how much to write about him, which is why I stay silent most of the time. How I feel about him, happy or sad, changes from day to day. So, if I post right after a big argument, you'd get a completely different picture than if I posted after we spent a day having fun together. Looking at it as objectively as possible, though, I'd say that a roller coaster is a pretty accurate description of our relationship. We went through a terrible break up between dating and getting married. It lasted for a year and half and was the hardest thing I've ever faced. Jesse was terrible during that time. He was mean to me and made me cry. He pushed me away and I didn't like him. But I really felt that God told me he was the one I was supposed to marry. I questioned God about it because I didn't like Jesse at that point, but still felt it was true. When we got back together and quickly got engaged and married, I saw the Jesse I had fallen in love with return. I assumed that the Jesse from our break up was not the real Jesse, and instead the sweet guy who put me above all else and sought to make me happy was the real Jesse. I was then hurt and shocked when years into our marriage I saw that ugly side of him again. I felt betrayed, like he had changed and was no longer the guy I vowed to love. But I recently realized that both sides are completely Jesse and completely real. And the one that I see can change from month to month, which is extremely difficult for me to deal with, but is reality...

I also used to believe that marriage was a representation of the church's relationship with God. It was intended to be one of passion and joy. One where the bride submitted her will to her husband's in complete respect for him. One where the groom sacrificed his desire and needs for that of his wife in order to lift her up and make her be the best she could possibly be. People gave me terrible advice when I was engaged, swearing that someday I'd get tired of seeing that same face next to me and be bored with him. I thought that marriage didn't have to be like that. I believed that if it were truly a representation of God's relationship with us, then it should always be passionate and exciting. And, while I still believe that's true, I believe there's a difference between what our relationship with God OUGHT to be and what it REALLY is. It ought to be passionate and never-ending and full of self-sacrificial love and respect. But if you look at the church, it's really full of many who are complacent or judgmental or are only looking out for themselves. I was even thinking of how marriage was in the Bible. Adam and Eve could have seen each other as true soul-mates, hand designed by God, literally each other's half. But when faced with trouble, they pointed the fingers at each other and said it wasn't their own fault. I thought of many examples in the Bible where there were multiple wives and concubines, and while this was normal of the culture, the truth is that the Bible doesn't give us very clear examples of marriages we should emulate. And then I thought of Hosea and Gomer. Hosea was a prophet of God, a man whose life was devoted to speaking the message God gave him, and yet God told him to marry a prostitute. When Gomer, the prostitute, ran away to be with other men, God instructed Hosea to BUY her back! It was his wife who left him, but he paid a price for her and brought her back to him. No matter how much she betrayed him and slept around with other men or walked away from their marriage, God told Hosea to be steadfast in his commitment. This was because God was showing Israel a picture of His relationship with them. In reality, the relationship with God and His chosen people wasn't love and butterflies and roses and date nights, it was adultery and apathy and, I'm sure, a lot of heartache. Yet, it was a picture of a God who never walks away- who is still there with open arms, even though He grieves the unfaithfulness of His "bride". 

When I look back at those many months that I prayed for Jesse, I don't believe I heard God wrong about Jesse being the one I was meant to marry. But maybe my understanding of God's purpose in our marriage wasn't totally correct. Our relationship is not nearly as extreme as infidelity and prostitution, but there are hurts and past addictions and stress and walls. Maybe God's purpose in our marriage is not so much a picture of God's perfect relationship with us, but of His imperfect relationship with us. I don't presume to be God, or even necessarily Hosea, in this scenario. I just mean that sometimes God purposes for things to be great so that His glory can shine through it, and sometime He purposes for things to be hard for His grace to shine through it. One can be used to bless us and the other to teach us, and sometimes both at the same time. I think we could really benefit from counseling, although I'm not sure how to make it financially possible. I also hope that someday we will be that sweet old married couple that talks about how they fell in love with each other even more as the years passed- the ones who can look back at the hard days earlier in their marriage and know they made it through better in the end. But, for right now, I feel like I have to just take each day and each situation and each argument to God, asking what I need to do in response. It feels often like being beaten down repeatedly and having to just suck it up and keep fighting. And it often feels like a losing battle, continuing to fight only to face the inevitable loss. A lot of times, I don't want to fight anymore. It seems easier to walk away (especially if this is what my future continues to hold), but I have to keep trying...And maybe it's one of those underdog fights where the person who looks like they're losing gets the knockout in the final minutes and becomes champion after all. I hope so! And if not, if it's what God still purposed for me, I have to believe there's good in the difficulty. 

But I hope for victory because, despite all of this, I do love Jesse. And I do believe he's a great guy. His good side is SO VERY GOOD! There's a side of Jesse that's an excellent dad and a loving, devoted husband. He's fun and I believe that his strengths complement my weaknesses. In that way, he makes me a better person and we work so well together. I believe God is good no matter what. Being in a difficult relationship is just that- DIFFICULT! But I know God is using it for my good. I pray it's for Jesse's good and for our kids' good as well. And my heart's desire is that it won't always be difficult, but no matter what, I will praise Him.

Daniel 3:16-18
Shadrach, Meshach, and Abednego replied, “O Nebuchadnezzar, we do not need to defend ourselves before you. If we are thrown into the blazing furnace, the God whom we serve is able to save us. He will rescue us from your power, Your Majesty. But even if he doesn’t, we want to make it clear to you, Your Majesty, that we will never serve your gods or worship the gold statue you have set up.”

Job 13:15
Though he slay me, yet will I hope in him;

Sunday, March 4, 2012

MOPS Monday- Chalkboard Pots

For our other meeting in February, we had a speaker come share gardening tips for our group. To go with this topic, I chose to do a potted plant as the craft, with an added twist of having the pots painted in chalkboard paint. However, because of the time to prime and paint the pots, I had to do this myself at home before the meeting. To still make it a craft worth doing, I bought a pot of flowers for each mom and provided the chalk and decorations for the pots.

My inspiration was this picture, which turned out a million times better than my own:
(I got the idea from Pinterest and used the original site, along with others, for directions. However, when I tried to link to it just now, I was warned that there were possible viruses. So I say, just google it or browse Pinterest for further images/directions.)

I really struggled to do this craft within my tiny budget, so I cut some corners. I bought one base for the terracotta pots as an example, but did not buy them for each person, as it would've added nearly $15 to my budget. I also was able to buy 2 pots and get the third free with special coupons from Fred Meyer, which helped cut down on the cost. 

I used the cheapest painter's tape I could find too. First, I taped off the rim of each pot with the painter's tape. 

The employee at Michael's recommended that I seal, prime, and paint each pot, but I ended up buying a black paint that said it was for ceramics, hoping that was good enough to seal and prime it together. I took all 15 pots outside, after being taped, and painted them with the ceramic paint. I coated each pot about 2 times, until all of the pots appeared to be evenly covered. I did notice that you could see where the price stickers had been, but the chalkboard paint later covered this up- no worries!

Once dry, I brought them inside.

Then, my mom helped me to paint each pot with the chalkboard paint, according to the directions:
 
And, once dry, I removed the painter's tape:

Then, I decorated the rim by gluing hemp around the rim and into a bow:

I bought pre-potted primroses for each mom to put into her new pot. In mine, I had violets. And then I used a chalkboard marker to write on my pot: Roses are red, violets are blue, I love MOPS, because of you!
(My violets were dead by this point! I do NOT have a green thumb!!!)
(I also think my pot failed in comparison to the inspiration because it was missing the bold, white, simple word the inspiration had. I think the small, colored hand-writing on mine makes it look less classy. I also like the original herbs, but found that I could not find pre-potted herbs for everyone in February. While I could've provided seeds and soil, I liked the instant gratification of already-blossomed flowers.)

I then bottled up nearly 2 ounces of the chalkboard paint for each person to take home their own bottle. This way, they could do any touch-ups they needed or do their own chalkboard project at home.

I made up directions for each person to take home, instructing them on how to properly use their chalkboard paint:

And, I made sure to add the inspiration picture, along with this idea as well, on our MOPS facebook page, so that everyone could see the great ways they could use their pots:


MOPS Monday- Dry Erase Frames Craft

MOPS Monday is coming to you very late on a Saturday night/Sunday morning, but at least it's coming to you, right? If I didn't just post this, it'd never get done!

So...

I've seen these pictures floating all over Pinterest and immediately fell in love! I love that they are simple picture frames with just a piece of paper inside, and you can write on the glass with a dry erase marker, changing your message as often as you want!
Pinned Image Pinned Image Pinned Image Pinned Image  love message board 1
(Sources: #1, #2, #3, #4, #5)

I knew that, for our February love theme at MOPS, this craft would be perfect! I mirrored mine most after #5, since they used a patterned paper, told their exact fonts in their tutorial, and used flowers to adorn their frame.

I bought my frames from the Dollar Tree for $1, of course. The frame is specifically for documents or certificates so it holds an 8 1/2" x 11" piece of paper. I bought the paper inside from Michael's for $0.59. It was originally 12"x12" and I just cut it down to the appropriate size. Felt is $0.29/sheet at Michael's. I used 1-2 sheets of white and gray, so I'll say $1.20 for all of the flowers. (It'd be cheaper, though, if you did less/smaller flowers.) This is the tutorial for the flowers, which I still can't find an original source for:
Felt flower tutorial
Finally, I bought dry erase markers for roughly $1 each from Bi-Mart. I'm sure WalMart or any other store has them for around the same price, if Bi-Mart doesn't exist in your area.

This was the sample I made:

Before we did them as a craft for MOPS, we held our annual bake sale fundraiser. And, since not everyone can eat sugary sweets as well as wanting to add a few items for additional sales, I made quite a few crafts for the bake sale- including these frames! I sold them for $3, which I realize doesn't give you much, if any of a profit. However, since I made them and MOPS earned the money, MOPS still earned a profit, and every single one sold! Just before making them for the bake sale, I found one more style of frame, which I couldn't help but also include:
Pinned Image

For the 2nd paper, I just designed it myself using Microsoft Word, mimicking the original the best I could with the fonts I already have. So, for the bake sale, I made one sheet of each and sold the frame with both papers (which could be rotated out), decorated with flowers, and sold with a marker:
   

For most of these, I cut the pages down to 8"x10" and mounted them on a white piece of cardstock for a little bit of contrast and border. When it came down to doing this craft for our official meeting, I decided to condense it and have the ladies glue the two different papers to the front and back of cardstock, sandwiched in the middle. (I printed them all ahead of time on various patterns of scrapbook paper, since there was no way to have the moms make it themselves at the meeting.) With the papers mounted front and back, both papers are always inside the frame and the paper needs to just be flipped around when you want to change the saying. (There are no pictures of this, but I bet you get the idea.)

These frames were a HUGE hit. The ladies at my MOPS group seem to love the felt flowers, just like they did when we did the t-shirt scarves, since they are such a forgiving craft and look great no matter how much you butcher them! The rest was easy to put together and makes such a cute piece of decoration for your house or as a gift for a friend! 

Saturday, February 4, 2012

Artsy-Craftsy Me: Valentine's Take-Out Boxes

Today we had our steering meeting for MOPS, where the coordinators meet together to plan out the next month's topics, food, crafts, childcare lessons, etc. I have been trying to bring a sample of each craft I want to do so that the other coordinators can SEE the finished product. I know that not everyone can envision something based on just a description. So, I make up an example and present it to the group. I learned today, though, that it may be smarter to make only one instead of 7! I created all 7 as a gift for each person, and I'm glad I got to share it with them. They seemed to love the finished products and were appreciative of their sweet little gifts, but because I created two love-themed crafts for February when we're having one relationship-themed meeting and one gardening-themed meeting, this idea got tossed out. No hurt feelings. I understand fitting the craft to the theme, but I wish it hadn't taken me all day yesterday and staying up late at night to finish the crafts when they won't actually be used for the meeting.

Disappointment aside, I thought that SOMEBODY might want to make these adorable gifts, and one coordinator specifically asked me for the instructions. So I thought I'd make up a tutorial.

What am I talking about? These cute Chinese take-out boxes filled with felt fortune cookies!

Take-Out Boxes:
I got the template for the boxes from this site. The small box is very small and the large box seemed to fit better for what I wanted. However, since my printer doesn't print on 12x12 paper, I had the hardest time getting the right size pattern. I ended up holding a piece of 12x12 cardstock to my computer screen and tracing the image. Then I laminated the pattern with contact paper and cut it out. If you know me personally and want to borrow my pattern, that's fine. Otherwise, hopefully between the site I linked to and my experience, you can make your own.

I traced this pattern on the back of my sheet of cardstock, using a different pattern for each person. You just cut it out on the perimeter (just like the pattern is) and then fold on every dark line. Your's won't have dark lines if you just trace the outside, but it's pretty easy to know where to fold based on where your corners/joints are. I used tacky glue on most of my boxes to glue the far left tab to the far right side of the box (going by the picture). I also folded down two of the bottom tabs (left and right) and then folded the other two (top and bottom) over those and glued them down to secure the base. I threw an extra one in at the last minute and used hot glue instead. Both glues work great, but the hot glue does not give you room to readjust your pieces. I found out after I was completely done that my slit and tab for closing the flaps did not line up. I ended up having to cut an extra slit and it wasn't a tight fit. Next time, I'd wait until I know how the pieces line up and cut my slit with an x-acto knife once I know where the tab should fit in. 

Fortune Cookies:
When it came to the fortune cookies, I followed the various tutorials I found online, but ended up using my own technique to shape them the way I thought they should be. So, I'll share my way! The other tutorials are pretty easy to follow and can be found just by googling "felt fortune cookies", but I found they weren't very informative when it came to understanding exactly how to fold them properly.

1) First, I cut squares of felt, about 3" squared. Then I traced a circle using the largest cup in my house. You could combine these into one step and just trace the circle right onto your felt without cutting a square. In fact, I'd recommend that. Live and learn :-) You could make a really large cookie or many smaller ones. Just make a smaller circle- easy peasy!

2) Next, I cut a piece of wire and hot glued it to the middle of the circle. I used floral wire because that's what I already had on-hand. It doesn't matter what kind- you just don't want it too thin/weak. I used the scraps of felt to cut a small strip to cover the wire. It turned out later that no one would see this, but it helped me to secure the wire with minimal burns and helped stabilize the cookie.

3) After the wire was set (roughly 30 seconds later), I trimmed the excess felt and wire from the cookie. Next, I added a line of glue along the top of the cookie. Do not glue all of the way across. You want it open enough for the fortune to go in and the glue is mostly to hold the shape. Then I folded the cookie to attach the bottom of the cookie to the top.

4) Once that glue was dry, I slipped the fortune through the middle of the cookie. You want just a bit to stick out.

5) This part gets tricky to explain but made the biggest difference in my method versus others. (That and gluing the top and the bottom together.) I slipped one finger into each side of the cookie until they met in the middle and folded the cookie (where the wire is) in half. I was careful to keep the middle of the cookie flat, though, as I bent it. I think this made it look more like a real fortune cookie. I found that the cookie looked too spread apart.

6) To keep the cookie a little more closed without losing the bend completely, I put a dab of hot glue in the crease, slipped my fingers back in and held the cookie closed until the glue dried. Once dried, I pulled my fingers out and found the perfect shape, in my opinion.

(The fortune is easy to pull out, but I wouldn't expect it to go back in easily... or maybe at all. I haven't tried to know for sure.)

This is the bottom of the cookie, to see how it wrinkles up (which seems pretty true-to-life to me):

And here's the finished cookie:

Fortunes:
I designed the fortunes in Microsoft Word, using Word Art, shapes, and various fonts. These pictures are replicas of the fortunes, showing the font and design I used, but not true to size. I printed them out on regular printer paper and used a glue stick to glue the "Happy Valentine's Day" and the note to the person back to back. Just one layer of printer paper would be too thin in the size that I made my cookies. You could print on cardstock instead and only use one layer, though.
Each person got 2 cookies in their take-out box (there was probably room for a 3rd or possibly even a 4th). For the 2nd cookie, I used two Bible verses. I wanted them to fit with the love theme too. So I chose one about loving each other and one about God's love for us:
Embellishing:
I wanted to make a cute little label on the outside of the take-out box. I got the idea from this site. Their take-out boxes are ADORABLE and I'd love to buy some like them, but I was purposely trying to find a way to make my own out of scrapbook paper. I loved the label as well, so I created my own version. If you read about my body scrubs, then it is pretty much the same process. I designed it on Microsoft Word using a 1.5"x1.5" circle and a text box with various fonts and colors. 
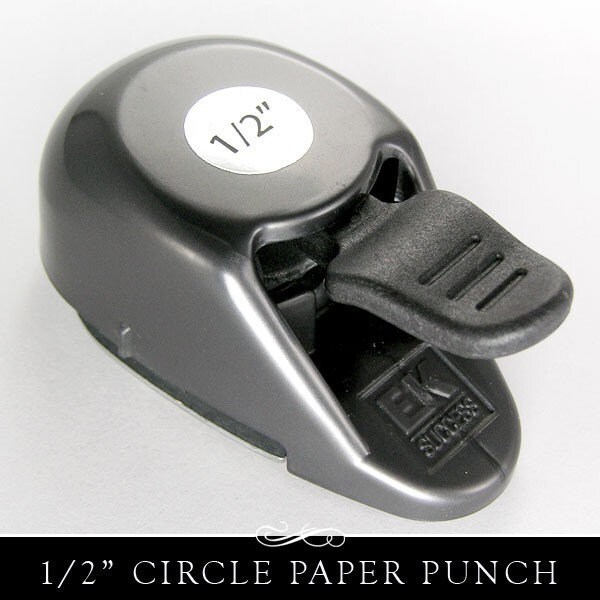
I punched it out with my circle paper punch. It gives me a perfect circle in seconds. So easy! I love it! 

Then I cut out pink and red scalloped circles from cardstock using my scalloped punch:
(This is just an online screen shot, same design, not the same size.)

This is what my final take-out box looked like:

A few suggestions for embellishments that I never got to do:
  • Create a handle. My suggestion would be to do this with ribbon. It was something I never got around too. I tried a pipe cleaner for one box and found that I didn't like the results at all. It was too short and aesthetically unpleasing. A thicker wire could also work. I wanted to make it a little curly too (when I tried the pipe cleaner). It'd be a cute little addition.
  • Add ribbon or a bow for a little extra texture. If you did a wire handle, a little bow would be adorable on it.
If you make one, let me know and link to pictures! I'd love to see how it works for you!!!


Thursday, February 2, 2012

MOPS Monday- Depression & Body Scrubs

Oh man! I've been so behind on posting! I have tons to write about, but rarely have both hands free to write...


So this MOPS Monday comes on Thursday!


This last week at MOPS, the topic was depression. It affects so many people and appears in so many ways. There's seasonal depression and post-partum depression and mild mood disorders and chronic or clinical depression. A counselor from CAFA came to speak with us about the topic. The thing that stuck out to me the most was the idea of how negative thoughts can physically hurt you. The counselor told us that stress is a source of depression, but that the way you think about the stressful situation impacts your mood much more than the stress itself. She said that when you think negative things, your body releases cortisol and adrenaline, but when you think positive things, your body releases serotonin. So, negative thinking actually is "toxic" (in her words) to our bodies! She brought up a few verses that relate well:


2 Corinthians 10:5- "We demolish arguments and every pretension that sets itself up against the knowledge of God, and we take captive every thought to make it obedient to Christ."


Philippians 4:8- "Finally, brothers and sisters, whatever is noble, whatever is right, whatever is pure, whatever is lovely, whatever is admirable- if anything is excellent or praiseworthy- think about such things."


For the craft portion of our meeting, we decided to do something that was relaxing and good for our mental/physical health. So, I came up with the idea of body scrubs. I browsed a million different sites through Pinterest and Google and compared recipes. There were chocolate ones and coffee ones and sugar ones and salt ones. It was hard to narrow it down! I finally settled on one coffee scrub, one vanilla brown sugar scrub, and one citrus brown sugar scrub. It would've been easy, supply-wise, to do all 3 since so many ingredients over-lapped. However, when I priced out each scrub, the first two were significantly more expensive than the 3rd, especially when multiplied by 20! So, the citrus scrub it was, specifically an Orange Creamsicle Brown Sugar Scrub that sounded absolutely delicious!!!


I got the recipe from this site. It was a wild goose chase to find everything, although there were only 5 easy ingredients:

  • ⅔ Cup of Brown Sugar
  • ⅓ Cup of Olive Oil
  • 10 Drops of Vitamin E
  • 5 Drops of Orange Essential Oil
  • 5 Drops of Organic Vanilla Extract
  • 1 Tablespoon Honey, optional for dry skin (I didn't use this)

However, since I'm on a tight budget, it was important to find each thing for as cheap as possible. So, a few times I went to a store only to find that the sugar or oil was more expensive there than somewhere else. I suppose after driving around town so many times, $0.40 extra shouldn't have mattered! The orange essential oil an vitamin e oil were also hard to find. While WalMart has vitamin e oil, they were out of stock. And I was told Fred Meyer also had it, but I searched long and hard through the aisles and came up empty-handed. Both can be found easily at most health food stores. I was trying to get as much at one store as possible, though, and while Springfield/Eugene is filled with health food stores, I'm not used to going to them and therefore hesitant to go. In the end, I went to 8 stores to find those 5 ingredients! AGH! I was about to rip my hair out by the end. I got the brown sugar, olive oil, and vanilla extract from WalMart, the vitamin e oil and mason jars from Bi-Mart, and the orange essential oil at Wynant's. 


I mixed up a sample the night before our meeting and found it easy to make. It fit perfectly into 4oz canning jars. I did think the olive oil was a little overwhelming, though, and should've used less than the recipe called for. Because of this, I used 10 drops of orange oil and 10 drops of vanilla. I still thought it needed more to cover up the olive oil, but I wanted it to be do-able for the MOPS group and couldn't go crazy with too much. Other moms did better at the meeting, using less olive oil and their scents turned out great!


I then made up a label for the jars. I designed them using Microsoft Word and mounted them on orange paper. Both were punched out with paper punches I own- some of my favorite craft supplies. (As a side note, this is exactly how I make cupcake toppers as well. I just mount them on sucker sticks or toothpicks instead of gluing them to the jar.) These were attached to the lid with hot glue. 

And I finished off my jar by tying orange ribbon around the jar and including a clear plastic spoon for stirring and scooping. 


It was easy to put together once I figured out how many bags/bottles I needed for the amount of people in the group. The moms in my group seemed to be excited about the craft too. Many people told me they couldn't wait to use them and others shared that their skin felt nice and smooth after use. 


Here are a few more tips for making body scrubs:

  • Feel free to substitute any essential oils that you would like to use. You can also use jojoba oil, sweet almond oil or avocado oil as a base if you choose. 
  • The sugar will separate a bit from the oil, but that’s normal. Don’t add more, just stir it up a little every time you use it.
  •  Use cane sugar. It is softer than raw sugar.
  •  Sugar contains glycolic acid, a component that keeps skin healthy. It moisturizes, conditions it, and protects it from the harmful effects of toxins. If you use a brown sugar scrub on a regular basis, it will help to improve your skin’s ability to retain its natural moisture balance.
  • Coffee helps with cellulite and varicose veins. Coffee and Caffeine are showing up all over in beauty products due to their tightening and antioxidant effects on the skin. Caffeine, works on skin in the three primary ways: as a vasoconstrictor, an antioxidant, and a diuretic. Applied topically caffeine helps to redistribute fat cells and decrease the formation of cellulite. It also acts as a vasorestrictor, tightening and shrinking blood vessels thereby helping eliminate varicose veins.
  • Coffee, in a body scrub, can make you feel more alert too, because you associate the smell with the invigorating effects of drinking coffee. (It's a learned response.)
  •  If you have sensitive skin, do not add coffee grounds and use brown sugar (as it is less abbrasive) 
  •  If you would like a coarser scrub, try 1/2 cup of sugar and 1/2 cup of coffee grounds. 
And to use:
After you’ve washed up in the shower or tub, right before you step out, apply scrub on your skin and rub onto your skin in a circular motion.  It buffs away dead skin cells and leaves a new soft layer of skin.  Once you’ve scrubbed all over, rinse off any excess sugar.  You’re left with soft, smooth and moisturized skin.  Can be used daily.  Caution: the oil in the sugar scrub can cause the tub or shower to become slippery. I was also asked about the shelf life of the scrub. I believe it lasts as long as the ingredients do. In my case, the brown sugar lasts until Dec 2012, olive oil until June 2013, vanilla until Nov 2014, and vitamin e oil until April 2014. If you know otherwise, please let me know :-)